
Sugar Free Marshmallows: Easy Keto Recipe
These homemade sugar free marshmallows were born out of my cravings for a treat from a favorite bakery of mine. When I lived in Vancouver, there was a bakery called “Butter.” They had the most incredible homemade marshmallows. I loved them. Butter also has a cookbook (amazing cookbook I might add) that had their famous marshmallow recipe that I rediscovered last week. I started thinking – would this recipe work with allulose? YES, the answer is YES, yes it worked. These keto marshmallows are the adapted recipe without sugar or corn syrup, and I dare say they are just as good as regular marshmallows.
I had to give credit to Butter because their recipe was the inspiration for this version.
Seriously, you need to make a batch of these things. They are SOOOO good.
Low Carb Marshmallows – You won’t believe how easy they are to make!
Ok, these marshmallows don’t have any carbs.
Made only with gelatin and allulose, the carbs come out to a big fat zero. Unflavoured gelatin has no carbs, and Allulose is net zero.
I get a lot of emails about Allulose because of the packaging label rules. Allulose is not metabolized by the body. Unlike sweeteners like xylitol or malitol (the worst), it does not spike blood sugar. It also doesn’t have the same impact on the gut as some sweeteners do. If you’ve been eating a low-carb or keto diet for a while, you know what I am talking about.
With all that said, I don’t give health advice. I recommend to everyone that if you’re trying new sweeteners, find the one that is right for you and your personal dietary needs.
I like allulose because it doesn’t spike my blood sugar and doesn’t make me bloat out like I am 9 months pregnant with triplets, but I also really like it because of its similar properties to sugar. Oh and, it doesn’t kick me out of ketosis either. So as a sweetener, it’s a win-win-win.
Back to my original point; this recipe is SUPER easy, zero carbs, and I swear these marshmallows taste 95% like the real thing. I mean, I can’t say 100% because sugar tastes like sugar, nothing tastes exactly like sugar, but I mean it’s so close! But I can tell you the texture is dead-on, it’s 100%.
~This post may contain affiliate links. If you click one and make a purchase, I may receive a commission at no additional cost to you. I only ever recommend the ingredients or tools I use for my recipes. You can read more about our disclosure policy here ~
Sweeteners for this recipe
Allulose. That’s the sweetener you need for the marshmallow recipe. Allulose shares many properties with real sugar. It thickens when heated, turns to syrup, caramelizes, and browns in almost the same way as pure sugar. Other sweeteners do not have the same properties.
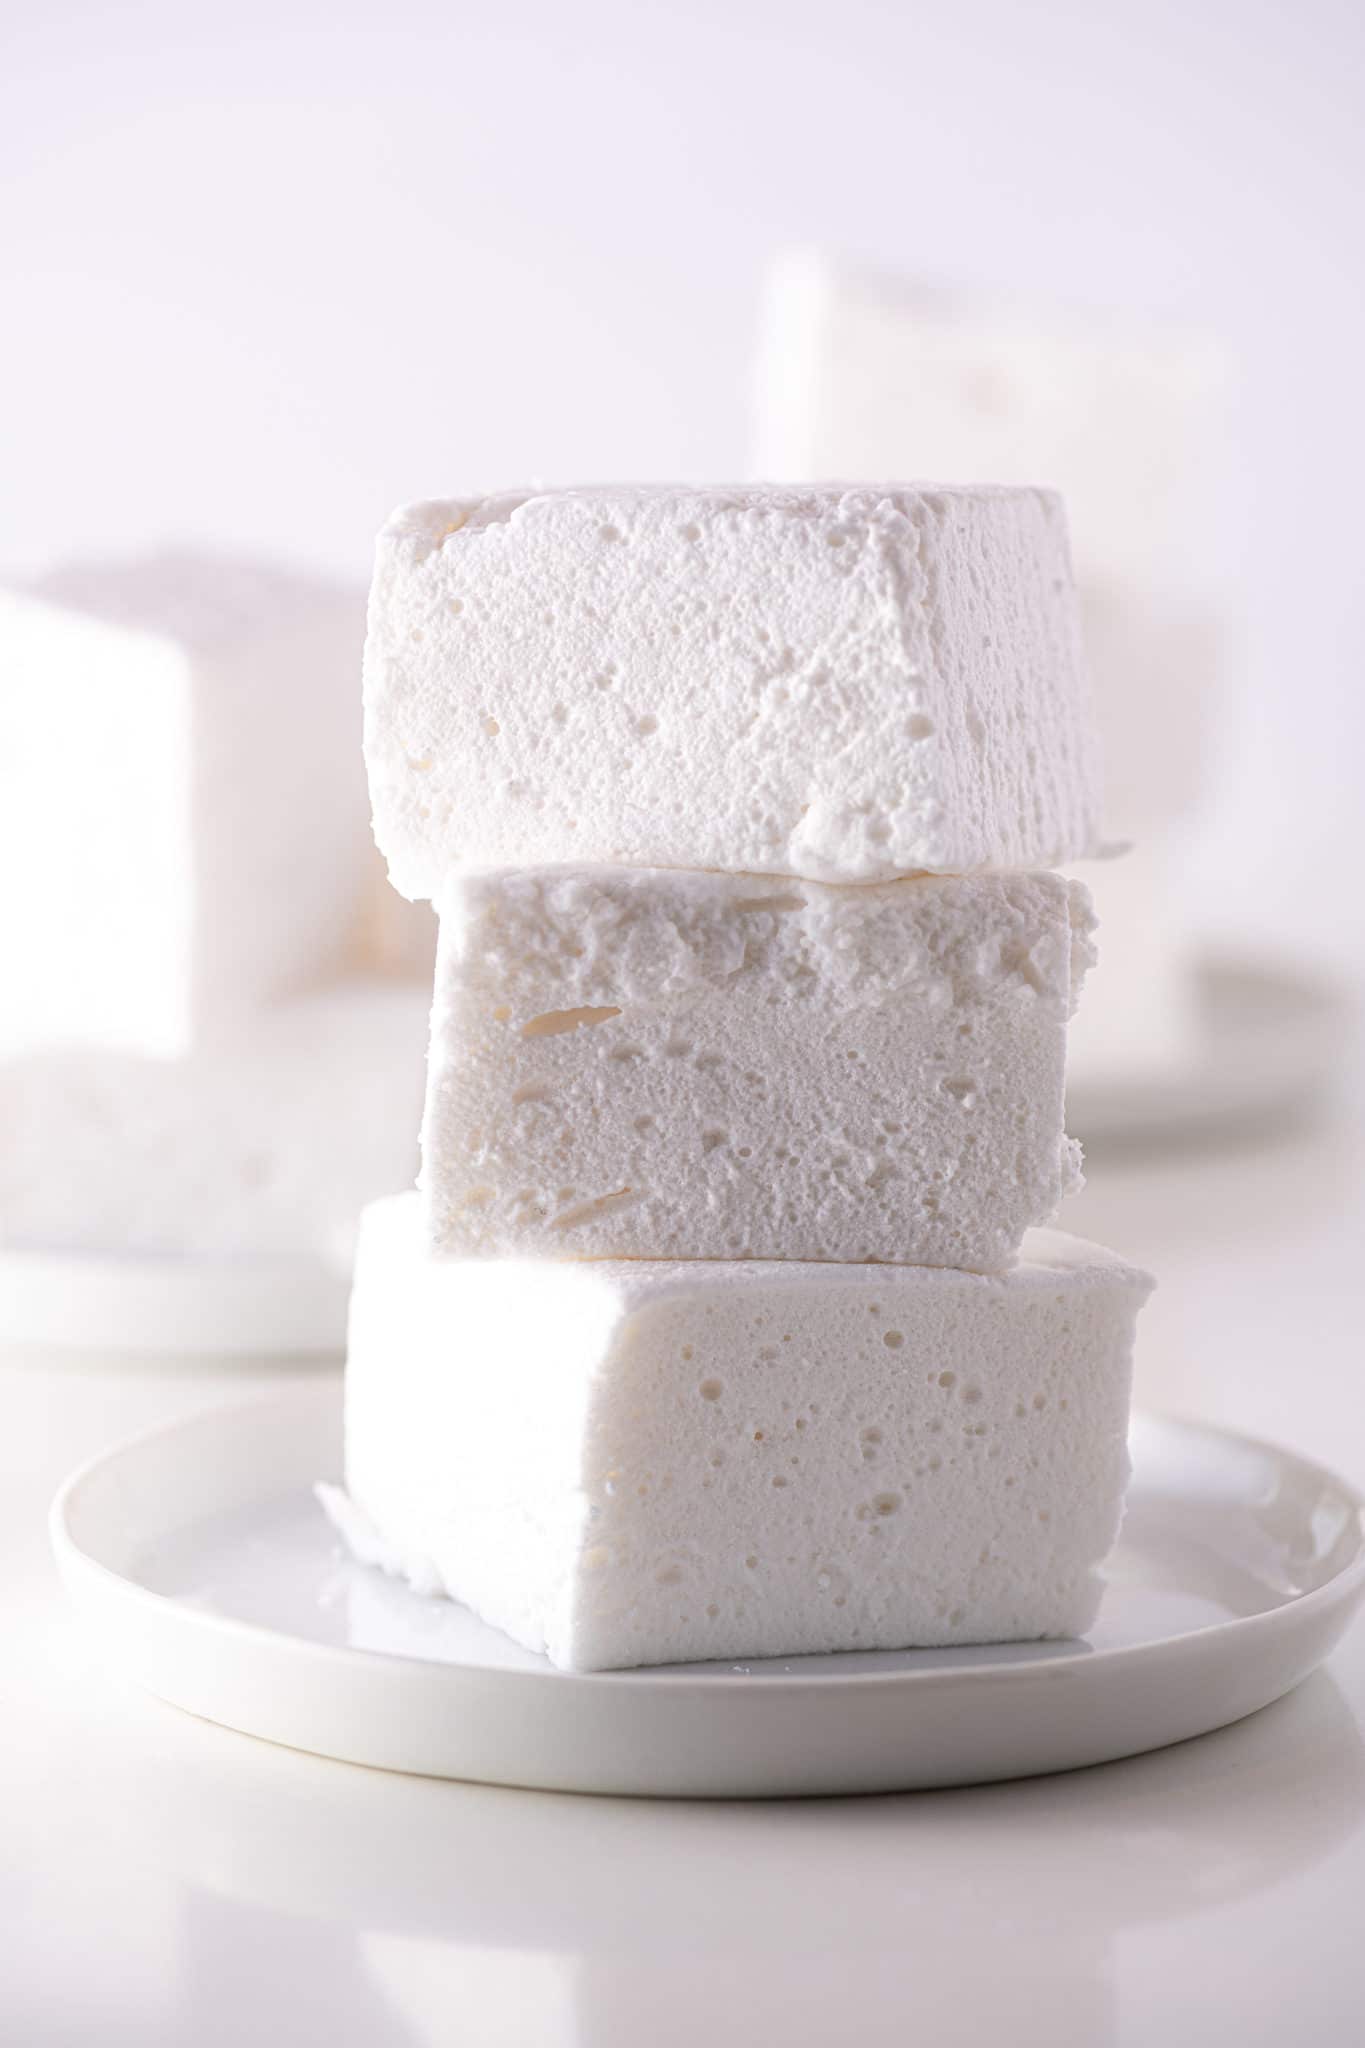
For this recipe, we need to whip heated sticky syrup to get the fluff and volume that we need for these sugar free marshmallows. Many low-carb recipes use egg whites to achieve this, but traditional marshmallows do not have eggs in them, and you can tell the difference between gelatin and eggs in a marshmallow recipe right away. The air bubbles are tighter, the squish has a bit of resistance, and the marshmallows taste better (In my opinion!).
So for this recipe, it’s allulose, or you’re making a different recipe.
For rolling the keto marshmallows after cutting, you can use powdered erythritol (I used Surkin Icing) monk fruit, or a blend. Toasted coconut works well too, and I have instructions for that for you down below.
Answers about Sweeteners, Low Carb Baking Tips, and General FAQ
For more detailed information about must-have baking tools and answers about sugar replacements, you can check out these FAQ pages.
We also have a handy sweetener replacement chart you can download for free!
Our FAQ Pages have answers to your biggest low carb baking questions including:
Tips for Baking With Almond Flour
Tips for Baking with Coconut Flour
Guides for Allulose, Monk Fruit, and Erythritol.
Substitutes for Xanthan Gum.
Method & tips
Homemade keto marshmallows seem like they would be a real time consuming difficult thing to make, but it is super easy.
You can make these with an electric hand mixer, but I recommend a stand mixer. You have to whip this for ten full minutes to get the fluff developed, and with a hand mixer, it could be a bit much. But I know many of you are determined, so if you don’t have a stand mixer you can make these, just know in advance it’s going to be some hard work. Consider it a workout. 😉
When you add the water to the gelatin, it’s going to look weird. The gelatin will clump up and look like a pile of goo.
The allulose and water will get cooked over a med-low burner until it reaches 230-240F. OR, if you do not have a candy thermometer, you only need to cook the syrup for a minute from the time it starts a rolling boil. That’s it. Turn the stand mixer on, and gently pour the hot syrup into the mixer and turn it on. Walk away for 9 minutes. Make yourself a cup of coffee. You deserve it.
At the 9 minute mark, come back and add the vanilla.
At the 10-12 minute mark, the marshmallow mixture should be fluffy and light.
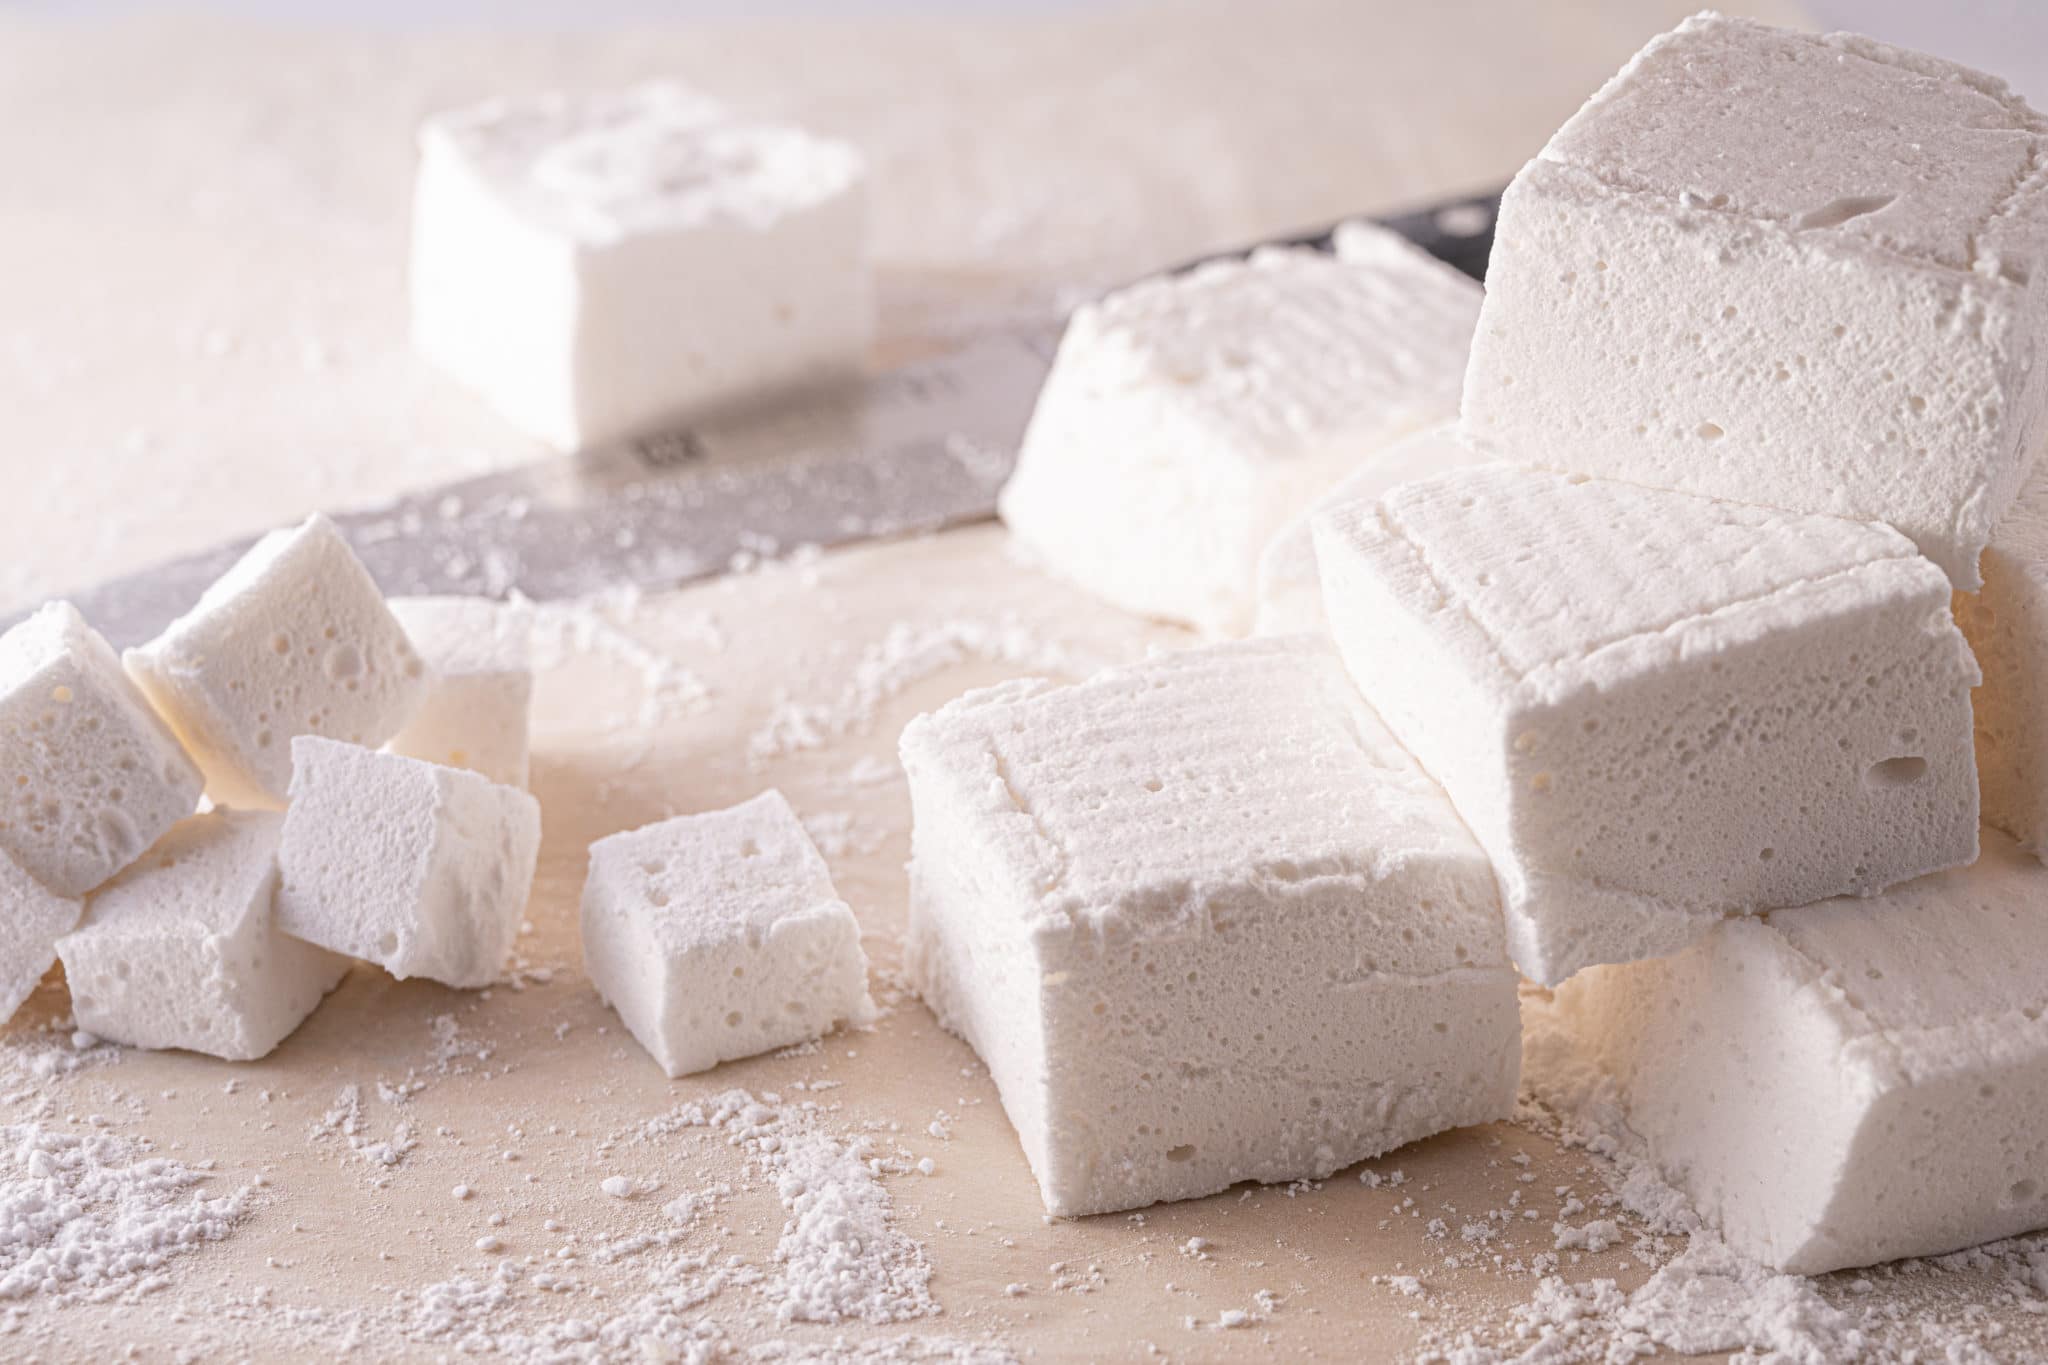
Cutting & Prep work
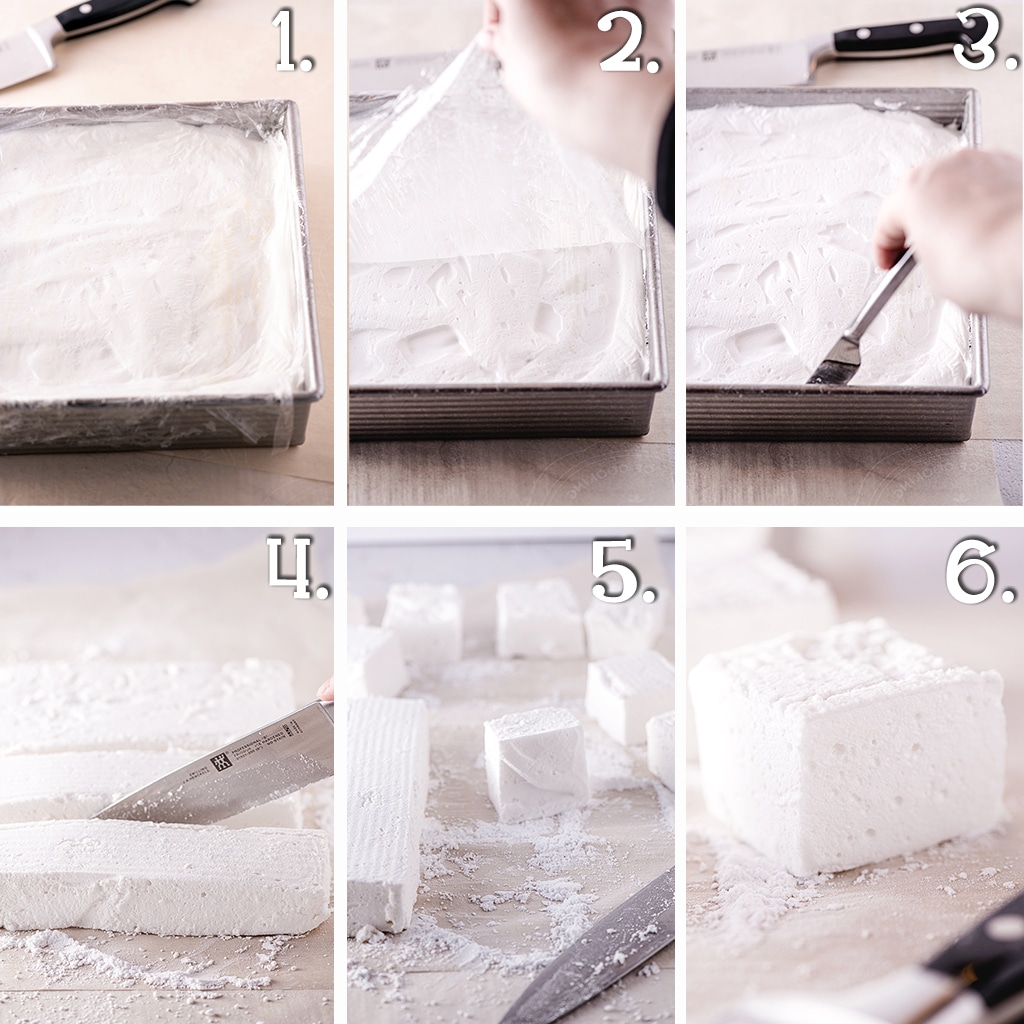
Once the Marshmallows are set, pull off the plastic wrap and use a knife to loosen the edge away from the pan.
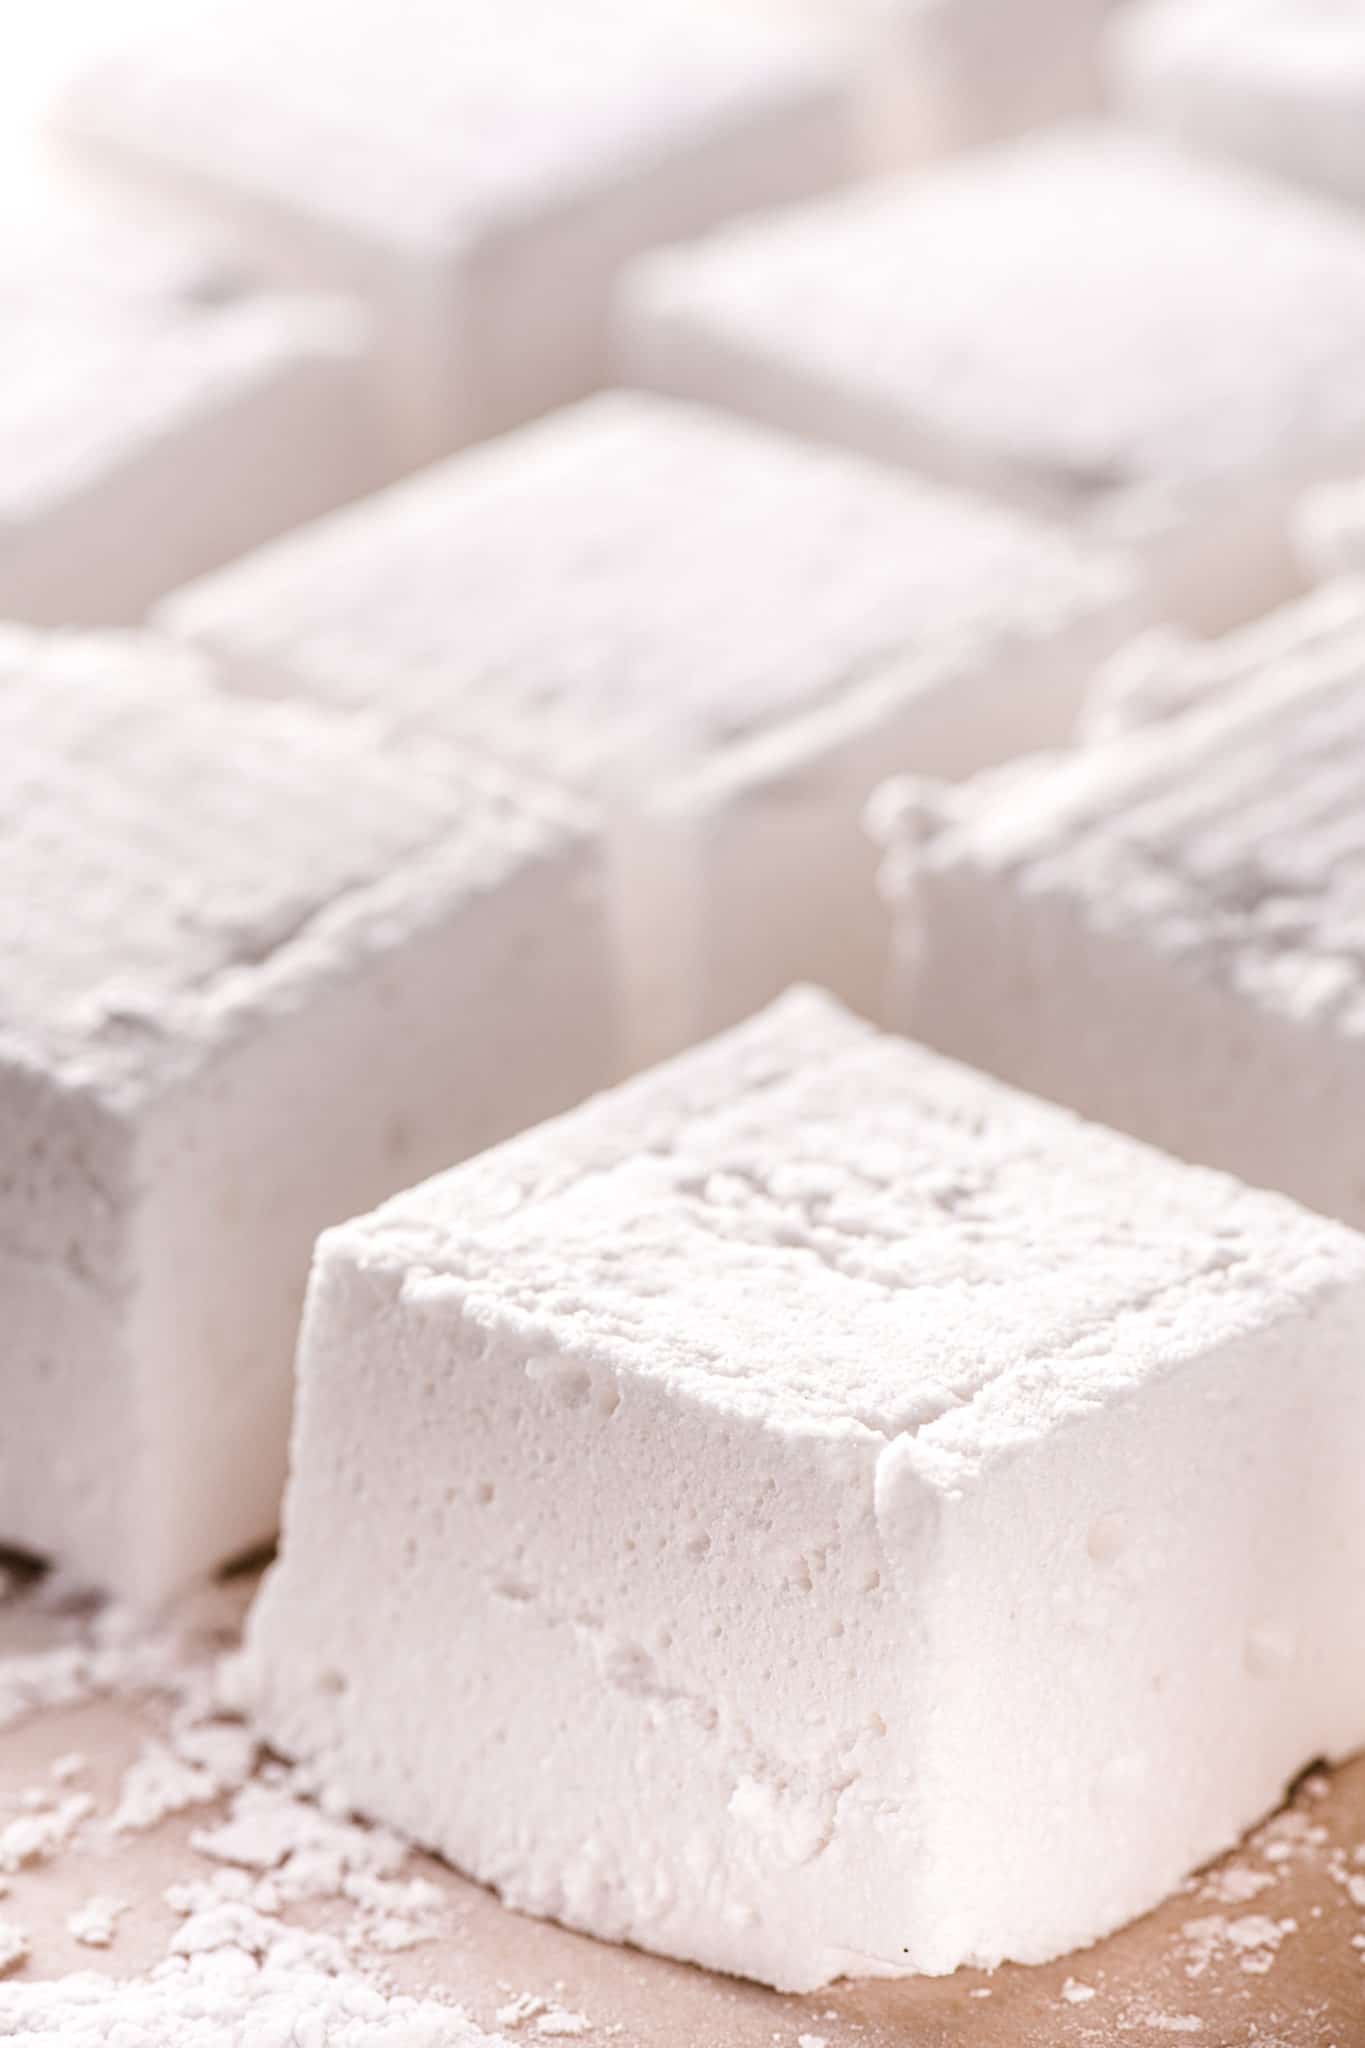
The keto marshmallow slab should release from the pan very neatly, if it is stuck, just give it a gentle pull and plop the whole thing down into a pile of powdered sweetener.
Use a sharp knife to cut the marshmallows and dip them in powdered sweetener as you go.
That’s it, super easy!
Low carb Marshmallow Variations
Oh, now we get to the good bits. You can create ALL kinds of crazy variations for these marshmallows. I’m going to drop a few of my favourite varieties, but the sky’s the limit here.
Toasted Coconut: Take 3 cups of unsweetened coconut and toast in a 350 F oven for 15 minutes or until golden brown. Add 2 Tbsp of your preferred powdered sweetener and blend it. Use this mixture to coat the marshmallows instead of the powdered sugar-free sweetener.
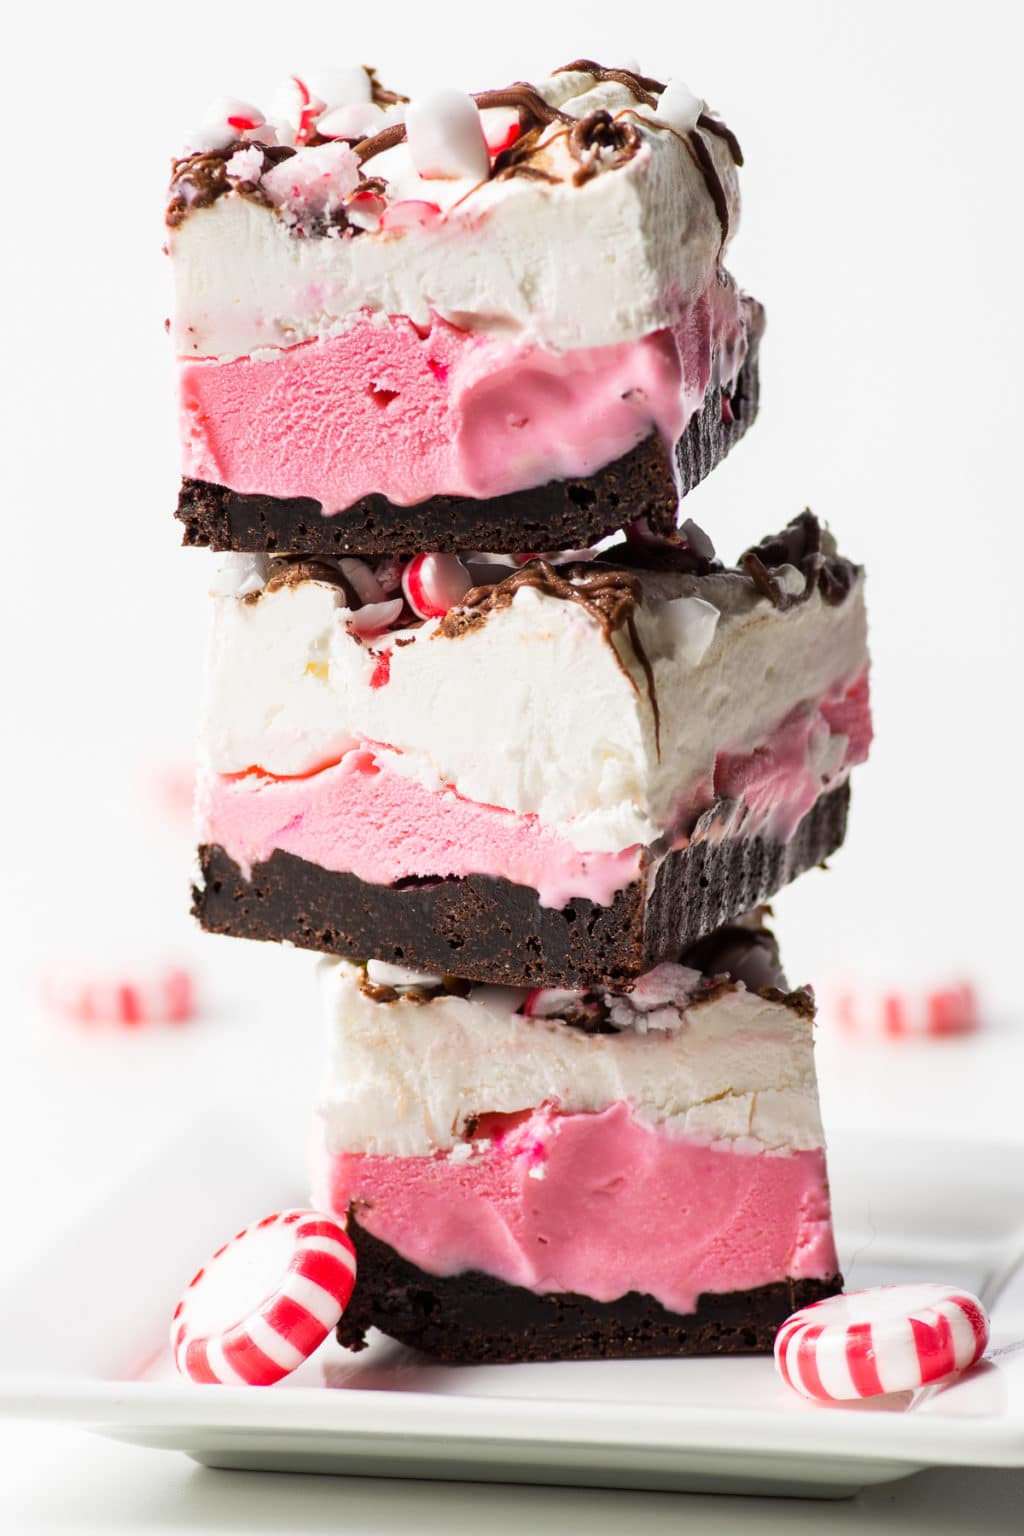
Strawberry: Add 1 tsp of strawberry emulsion to your marshmallows during the last minute of whipping. The strawberry emulsion has a BIG punch of flavor with no additional carbs. (raspberry works very well too!)
Coffee: Substitute the water in the recipe with coffee! (This is my husbands’ favourite version)
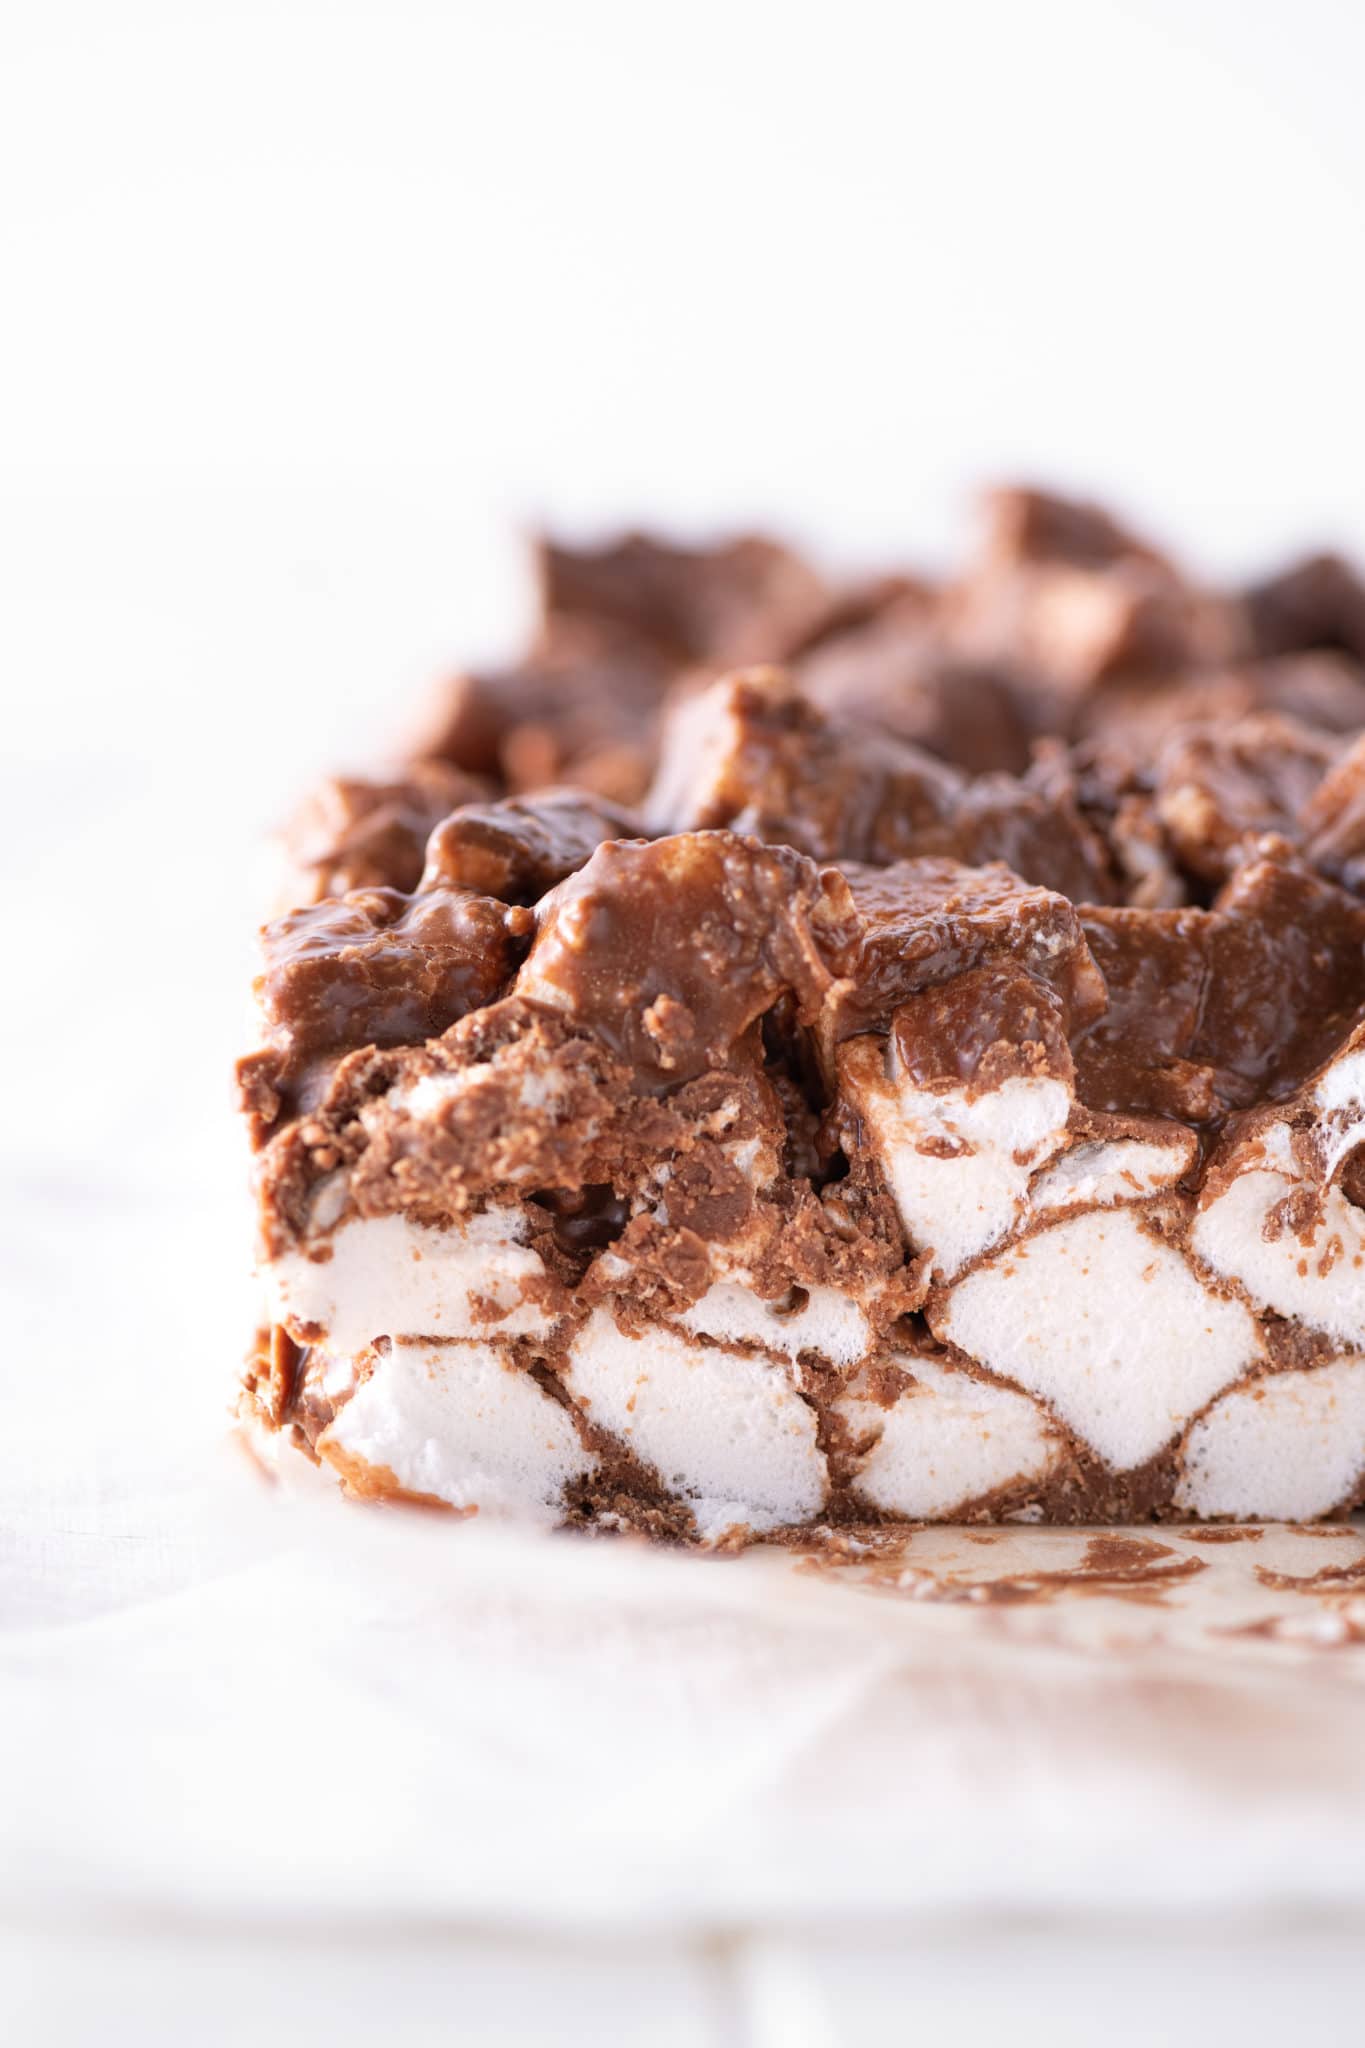
Chocolate: Add 1 Tbsp of cocoa powder to the whipped marshmallow mixture.
Double chocolate: Make a batch of chocolate marshmallows. When they are cooled, dip them in Lily’s melted dark chocolate. These make great treats on a stick.
These are just a few ideas. You can do all kinds of things with this keto marshmallow recipe. I will be testing all sorts of crazy stuff in the coming weeks to see how these marshmallows hold up when baked.
Storage & serving ideas
These sugar-free keto marshmallows store well when sealed in a bag or an airtight container. No need to refrigerate, they hold up well stored at room temperature, but you can toss them in the fridge. They do not freeze well, so I do not recommend it. Since the carb count is SO low, I imagine a stack of these will be gone in no time flat.
They melt just like the real deal in hot chocolate, and you can toast them just like real marshmallows, too! Allulose does tend to burn quicker than sugar, so my advice is to go slow when roasting, and don’t let them catch fire.
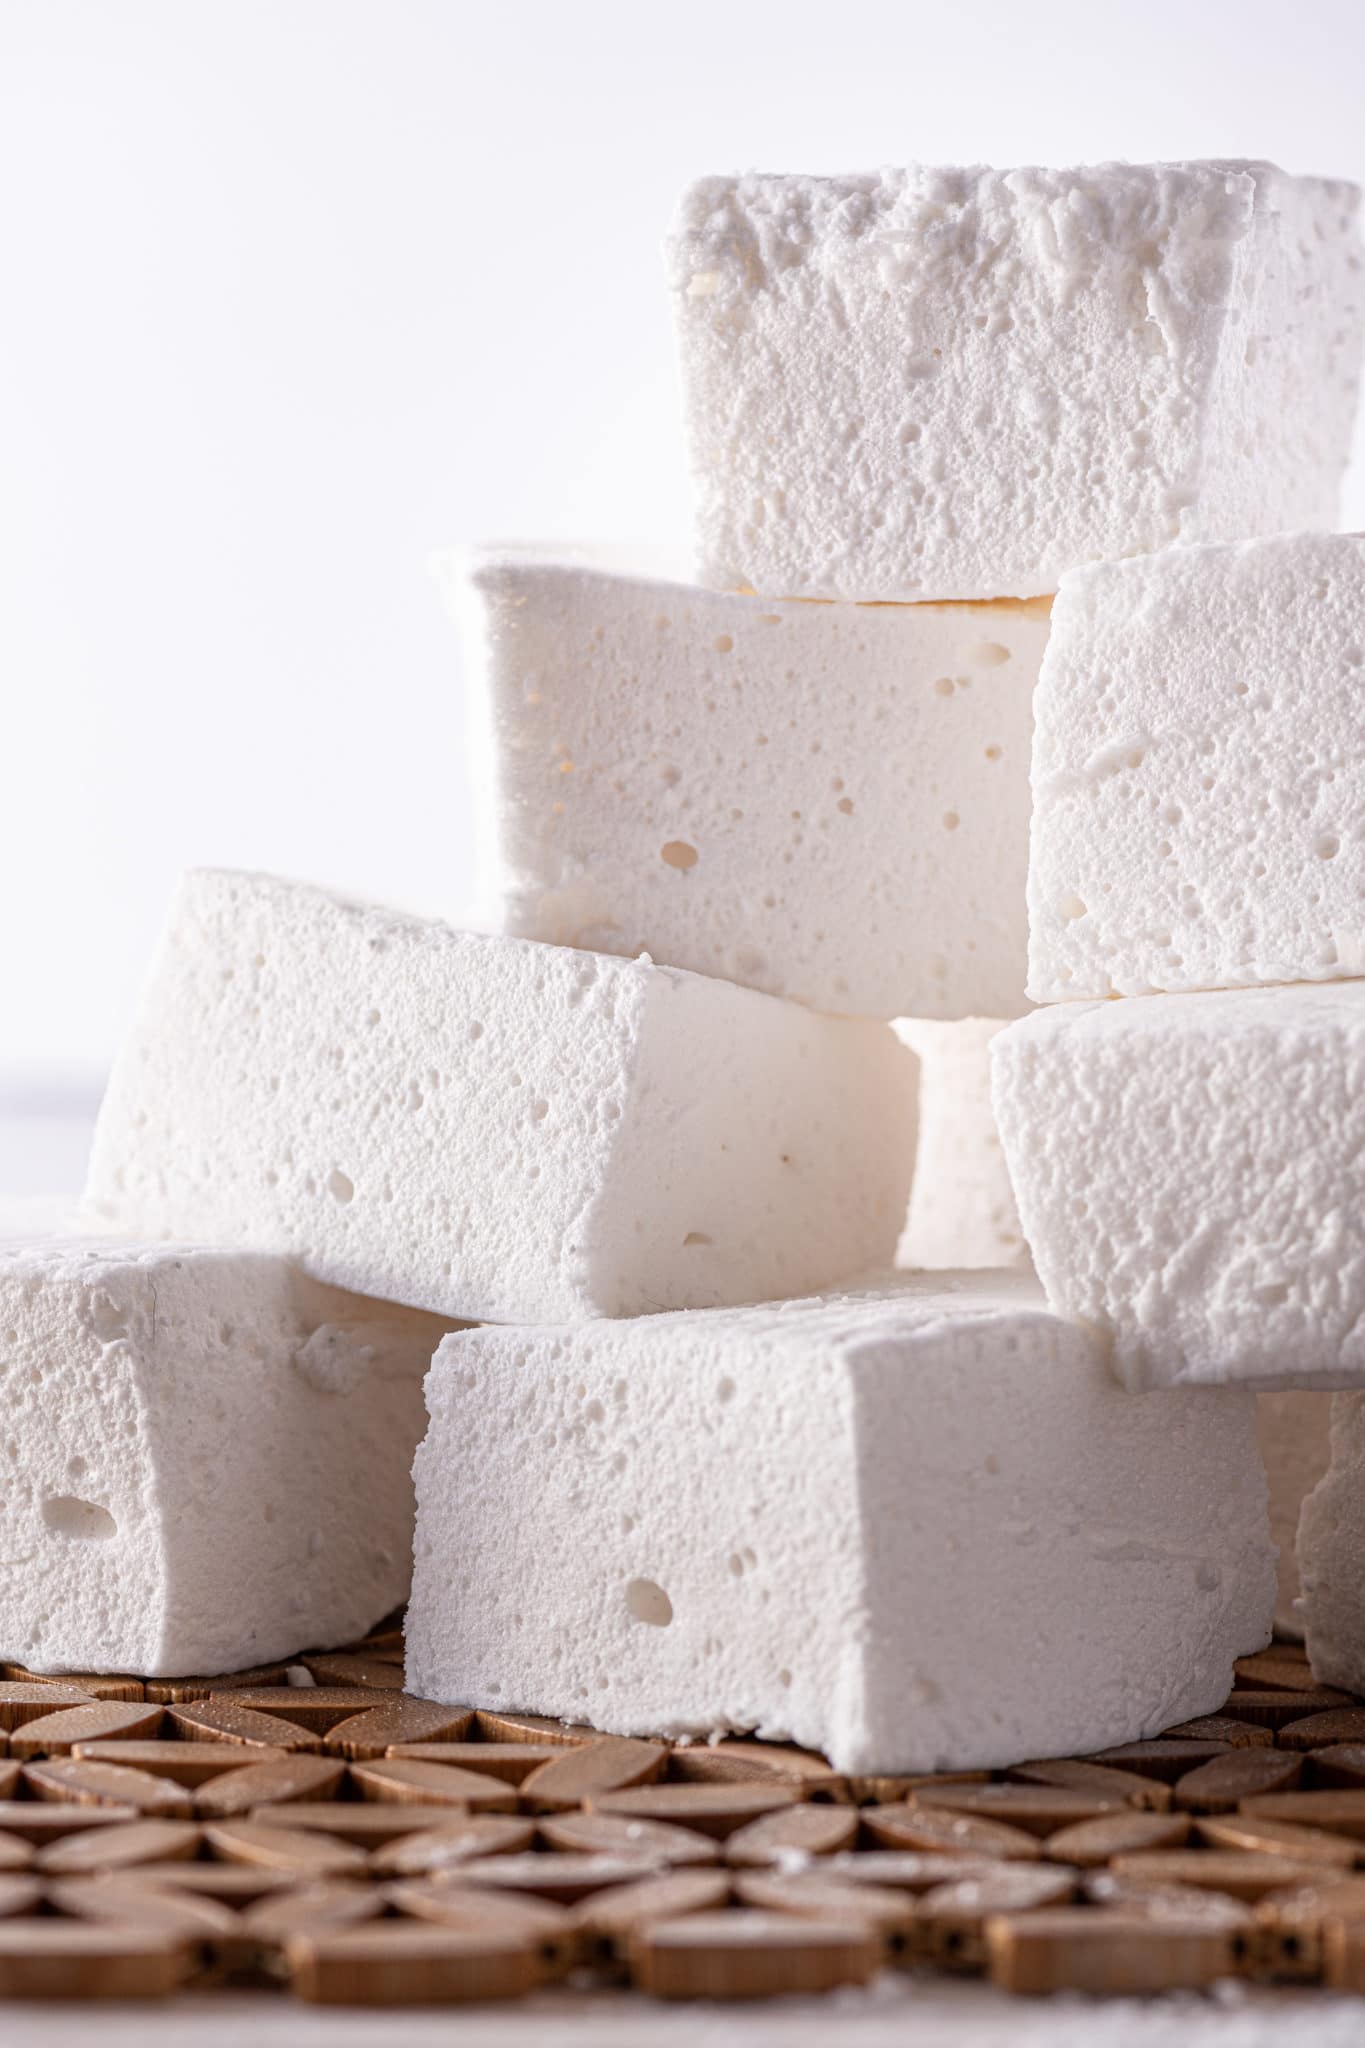
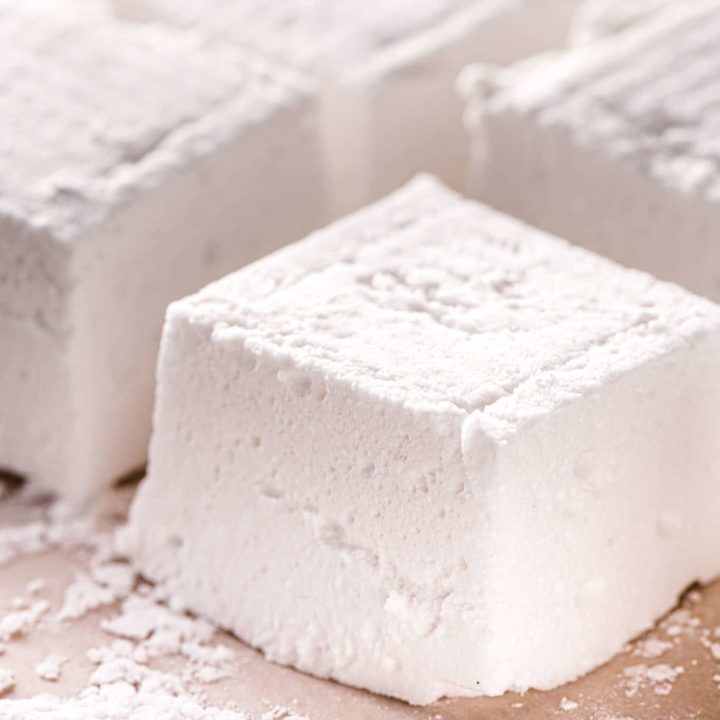
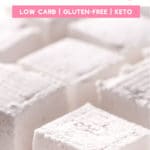
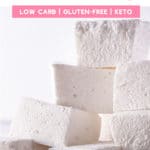
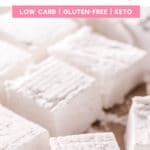
Sugar Free Marshmallows that Taste Like The Real Thing!
These Keto Marshmallows are as good as the real thing. The texture is bang on, and the taste is just like squishy pillows of sweet vanilla goodness.
Ingredients
- 1 cup water
- 3 envelopes of unflavored gelatin (3 Tbsp)
- 2 1/2 cups of allulose
- 1/2 tsp salt
- 2 Tbsp vanilla extract
- 2 cups of powdered sweetener (for coating the marshmallows)
Instructions
- Add the gelatin to the bowl of a stand mixer fitted with a whisk attachment. Sprinkle the gelatin with 1/2 cup of water. Set aside and let the gelatin soften.
- In a medium saucepan over medium heat add the allulose, salt and remaining water. Bring the mixture to a rolling boil for one full minute, or cook until a candy thermometer reaches 230-240F.
- Turn the stand mixer to low speed to mix the gelatine.
- Add the hot allulose mixture to the gelatin mixture by gently pouring down the side of the stand mixer bowl and mix on low.
- Turn the stand mixer to high speed for 10-12 minutes. At the 9 minute mark, add the vanilla and continue whipping until the marshmallow batter is thick enough to form stiff peaks.
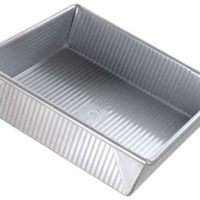
- Transfer the mixture to a square baking pan coated in butter.
- Coat a piece of plastic wrap with melted butter and cover the top of the marshmallows.
- Allow to cool for 6-8 hours or overnight in the refrigerator.
- Once the marshmallows have set, use a butter knife and run it along the edge of the pan to release the sides. Gently tip the pan over to release the marshmallow slab.
- Place the slab of marshmallows on a cutting board coated in powdered sweetener.
- Use a sharp knife to cut the marshmallows into 16 pieces.
- Use the excess powdered sweetener to coat the marshmallows.
- Store covered in the refrigerator or on the counter.
Notes
- Allulose is the only sweetener that will work for this recipe.
- You can replace the vanilla with any flavour extract you want.
- Cook the allulose on medium heat, not high. Allulose burns quickly and will add an off flavor to your marshmallows if you cook it too quickly and too hot.
- Don't forget to butter your pan before adding the marshmallow batter. You will also need to butter a piece of plastic wrap to add to the top. It will release once the marshmallows have set.
- Do not try to cut your marshmallows until they are truly set. Leaving them overnight in the refrigerator will guarantee they are set.
- Be very careful with the hot liquid allulose mixture.
Recommended Products
As an Amazon Associate and member of other affiliate programs, I earn from qualifying purchases.
-
 KNOX Unflavored Gelatin, 16 oz. (Pack of 2)
 -
Sukrin Icing - All Natural, Zero Calorie, Zero GI, Powdered 1:1 Sugar Substitute, with Erythritol and Stevia, Keto and Low Carb, Vegan, Baking, Frosting, Non GMO, 14.2oz (1 Pack)
-
Hoosier Hill Farm ALLULOSE Low Calorie, Zero Net Carb Keto Sugar, Natural Sugar Alternative, Made in the USA, Granular Powder, 2 lb bag, batch tested gluten free
-
USA Pan Bakeware Square Cake Pan, 9 inch, Nonstick & Quick Release Coating, Made in the USA from Aluminized Steel
-
ThermoPro TP03 Digital Instant Read Meat Thermometer Kitchen Cooking Food Candy Thermometer with Backlight and Magnet for Oil Deep Fry BBQ Grill Smoker Thermometer


Nutrition Information:
Yield: 16 Serving Size: 1Amount Per Serving: Calories: 16Total Fat: 0gSaturated Fat: 0gTrans Fat: 0gUnsaturated Fat: 0gCholesterol: 0mgSodium: 68mgCarbohydrates: 0gFiber: 0gSugar: 0gProtein: 0g
Nutritional information for the recipe is provided as a courtesy and is approximate only. We cannot guarantee the accuracy of the nutritional information given for any recipe on this site. Erythritol carbs (and sugar alcohols) are not included in carb counts as it has been shown not to impact blood sugar. Net carbs are the total carbs minus fibre.
Interested in More Keto Baking Ideas?
We’ve got all kinds of recipes for sugar free desserts, snacks, and keto friendly treats. Here are some of my favorite recipes:
- Sugar-Free Marshmallow Bars with Chocolate & Peanut Butter
- Keto Smores Cupcakes With Sugar Free Marshmallow Fluff
- Keto Whoopie Pies With Marshmallow Filling
- Low Carb Smores Brownies
- Delicious Peanut Butter Keto Cookies

Editorial Note: This recipe was originally published on March 19, 2020, and was updated on March 22, 2022.

how long can I store these before consuming? and would an airtight container be best?
Hi Graham, these hold up pretty well for 4-5 days in an airtight container at room temperature. Humidity will be the biggest challenge with them, so if you can keep them dry and airtight they will still taste pretty good on day 5. With that said, they are best the first two days after making them. But if you have a few that go a little bit firm around the edges, they still melt really well over a campfire or melt in hot chocolate (etc). Cheers!
I love the idea of homemade sugar-free marshmallows! Is there an alternative to gelatin that can be used to make them vegetarian?
Hi Stephanie, you could try agar-agar? I have no idea if it will work because I haven’t tested it or worked with it in a long while, but it does have very similar properties to gelatin. Definitely would require some recipe testing to see what ratios would be required. Hope that helps!
Hi Laura. Thank you for this recipe…can’t wait to try it! Is there any reason why allulose couldn’t also be used for coating the marshmallows, too? I use allulose because I don’t like the after taste of erythritol and I’d rather not add it to the marshmallows by coating them in it. Thanks!
Hi Luanne, you can absolutely coat these in powdered allulose. I don’t even know why I said to use erythritol at the time. It could have been because of cost, Allulose was pretty spendy back about a year ago. Cheers!
Great! The allulose I have isn’t technically ‘powdered’ and doesn’t say it is on the bag. It doesn’t feel like powder but it is very very fine (much finer than granulated sugar). I hope it’ll work. I guess I could try zapping some in the Vitamix to get it more powdery.
Hi Luanna, that should work fine without having to blast it in the Vitamix. I would say that the allulose that I get powdered isn’t quite as fine as regular powdered sugar, but it is finer than regular sugar. Hope that helps!
Thank you so much for developing this recipe! I’m hoping to use it to create diabetes-friendly rice krispy treats, one of my biggest vices before I became a type-1 diabetic. My thought is to use brown rice puffs and follow the standard kelloggs recipe. Do you foresee any issues I could head off before diving in, given the relatively high cost of getting allulose right now?
thanks again
Hi, without testing I cannot say for sure, but my gut tells me it will work out. The fluff is just like sticky melted marshmallows and creates the same texture (for the most part anyway). It may be a wee bit stickier than say a regular rice crispy treat, but it should still taste great. Drop me a line and let me know how they turned out!
Two questions… My batch got big and fluffy and white like you would expect from homemade marshmallows (I make non-keto ones regularly), but they never fully set up into cuttable consistency. More like a cross between fluff and mallows. Is it likely that it needed to mix more or that maybe my candy thermometer was off? Second, I thought these were pretty sweet – Do you think I could cut the allulose down to two cups without a negative impact?
Hi Carrie, if you continued to whip the marshmallows they would get a bit thicker and denser much like a regular marshmallow. Cutting down the allulose will likely be challenging in texture, you need that sticky sugar like mixture to get the texture right – less allulose will result in a not-so-firm marshmallow that may not set at all.